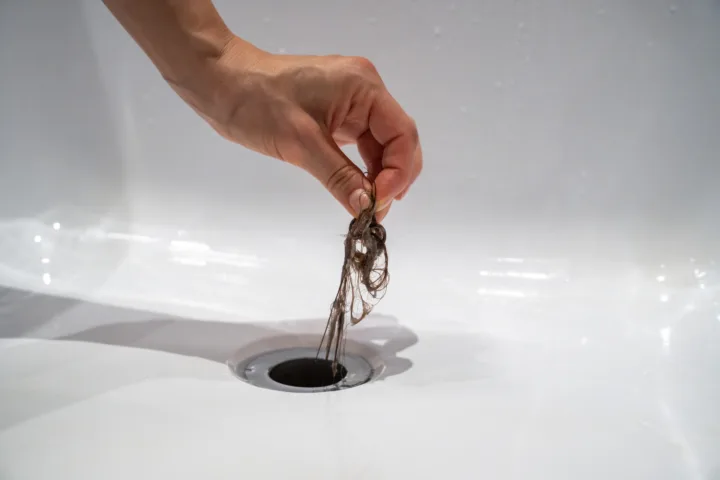
Standing water in the kitchen sink drives me crazy. I have dealt with it more times than I care to admit, usually right after I load the dishwasher or rinse a greasy pan. Learning how to unclog a kitchen sink myself changed everything for me. No more waiting for a plumber or throwing money at the problem. I now clear most clogs in under half an hour with tools I already own.
I used to panic. Now I stay calm and work through a short list of methods that actually deliver.
What Usually Causes the Clog in the First Place
Kitchen sinks clog for a handful of predictable reasons. Grease tops the list. I pour it down the drain when I am tired and in a hurry. It cools, hardens, and traps food scraps. Coffee grounds, rice, and pasta bits make it worse. They expand or stick and create a solid mass.
Garbage disposals fail more often than people expect. A jammed impeller or a forgotten reset button stops everything cold. The P-trap under the sink collects debris like a magnet. Hair rarely shows up in the kitchen the way it does in the bathroom, but soap scum and oil still build layers over time.
I check for slow drains first. Standing water means the clog has already settled in. Smells usually point to rotting food stuck in the trap. Once I know the likely culprit, I pick the right fix.
Keep a small countertop container nearby for grease, coffee grounds, rice, and pasta scraps before they reach the drain.
My First Move: Check the Garbage Disposal
I always start here if the sink has a disposal. Power off first. I unplug it or flip the breaker. Safety matters.
Next I press the red reset button on the bottom or side of the unit. Many times that alone restarts the motor and clears the jam. If it still hums without spinning, I grab an Allen wrench, insert it into the bottom hole, and turn it back and forth. That frees the impeller.
Then I run cold water and turn the disposal on for 20 to 30 seconds. Cold water keeps grease from melting and re-solidifying farther down the line. This step has saved me more times than I can count.
Honestly? I skip this once and regret it. Always start with the disposal.
Never reach into a disposal to free the impeller, even after switching off power. Use pliers or the bottom Allen-wrench socket instead.
Plunge Like You Mean It
A proper sink plunger beats a toilet plunger every time. The flat cup creates a better seal. I fill the sink with a couple of inches of water so the cup stays submerged. For a double sink I plug the other side with a wet rag. Same goes for any overflow hole.
I place the cup over the drain, press down to seal, and use short, fast thrusts. Twenty to thirty strokes usually do the job. Then I lift quickly and watch. If the water drops, I flush with hot water for a full minute.
This method moves soft clogs of grease and food. It fails on hard blockages deeper in the pipe. Still, it is my go-to second step. Cheap. Fast. Effective for most everyday messes.
Smear petroleum jelly around the plunger cup’s rim before plunging to improve the seal on a textured sink basin.
Boiling Water and the Baking Soda Trick
When plunging fails I reach for the kettle. Boiling water works best on metal pipes. I pour it slowly in stages so the heat has time to melt the grease. PVC pipes can soften, so I skip this if I see white plastic under the sink.
If the water still sits, I move to baking soda and vinegar. One cup of baking soda goes down first. One cup of white vinegar follows. The fizz starts right away. I cover the drain with a stopper or wet cloth and wait fifteen minutes. Then I flush with hot tap water.
This combo breaks down light grease and soap residue. It will not dissolve a solid food plug. IMO it works great as regular maintenance once a month even when the sink drains fine. FYI, the smell of vinegar fades fast once the water runs.
I like this pair because I already keep both in the pantry. No special trip to the store.
Clean the P-Trap Yourself
This step clears the majority of stubborn kitchen clogs. The P-trap is the U-shaped pipe under the sink. Debris settles there every time.
I place a bucket underneath. Then I loosen the slip nuts by hand or with channel-lock pliers. The trap drops into the bucket with a splash of dirty water. I dump it, rinse the trap in hot water, and dig out any gunk with a gloved finger or an old bottle brush.
I check the connecting pipes too. Sometimes a chunk of food hides right at the edge. Once everything looks clean I reassemble, tighten the nuts by hand, and run water to test for leaks.
The first time I did this I felt nervous. Now it takes me ten minutes. Most clogs live right there. Skipping this step means you keep fighting the same problem later.
When I Reach for the Drain Snake
If the P-trap looks clean and water still backs up, the clog sits farther down the line. A small handheld drain snake or hair snake solves it.
I insert the end into the drain opening and push until I feel resistance. Then I rotate the handle clockwise while feeding more cable. When the resistance breaks I pull the snake out and clean the debris off the barbs. I repeat until the cable runs freely.
After that I flush the line with hot water for two full minutes. A basic plastic snake costs under ten dollars and handles most kitchen jobs. A longer auger works if the clog sits deeper, but I rarely need one.
This step feels satisfying. You literally pull the problem out of the pipe.
When the snake meets resistance, retract slightly while rotating, then advance again. This helps the barbs catch food without kinking the cable.
Extra Tools That Sometimes Help
A wet-dry vacuum can suck a clog upward if you create a tight seal around the hose with a wet rag. I only try this after the easier methods fail. Chemical drain cleaners stay on the shelf for me. They can damage older pipes and rarely reach the real blockage.
Enzyme cleaners work slowly but safely for ongoing maintenance. I pour one in overnight once a month. They eat organic buildup without harsh fumes.
How I Keep the Sink from Clogging Again
Prevention beats repair. I scrape plates into the trash before rinsing. Grease goes into a jar, not the drain. A simple strainer catches coffee grounds and food bits. I run hot water for thirty seconds after every dishwashing session.
Once a month I do the baking soda and vinegar routine. It keeps the pipes clear and the smell away. These habits take almost no extra time and save me from standing water disasters.
Frequently Asked Questions
How to unclog a kitchen sink if the plunger does nothing? I move straight to the P-trap. Most of the time the clog sits right there and cleaning it out solves the problem in minutes.
Is boiling water safe for every sink? Only if the pipes are metal. PVC can warp under extreme heat, so I check under the sink first and skip the kettle when I see plastic.
Should I call a plumber right away? Not for the first clog. I try the steps above. If water backs up into other fixtures or the snake hits a solid wall I cannot move, then I pick up the phone.
Can I use chemical cleaners instead of these methods? I avoid them. They often fail on grease and can leave pipes weaker over time. Mechanical clearing lasts longer and costs less.
How often should I clean the P-trap? I only open it when the sink slows or stops. Regular hot water flushes and monthly baking soda keep it from filling up in the first place.
I used to dread a clogged kitchen sink. Now I treat it like any other small home chore. The methods I described here have cleared every clog I have faced in the last few years. Start with the disposal and the plunger. Move to the P-trap if those fail. Keep a cheap snake on hand for the rare deeper blockage.
You will save money and gain a quiet sense of competence every time the water finally drains. Grab the tools, follow the order, and get back to cooking. Your sink will thank you.