I spent years fighting my tiny walk-in closet. Clothes piled on the floor. Shoes vanished into black holes. Every morning felt like a scavenger hunt. Then I started testing real 19 diy small walk-in closet organization ideas that cost almost nothing and used stuff I already owned or could grab at the hardware store. The change hit fast. My closet stopped mocking me. Yours can too.
Honestly? I almost gave up twice. The space felt too small to bother. See, that thinking keeps most of us stuck. The real fix starts with treating every inch like it matters.
Start With a Ruthless Clear-Out Before You Add a Single Shelf
I used to skip this step. Big mistake. You cannot organize clutter. You just rearrange it.
Pull everything out. Everything. Sort into keep, donate, and toss piles right on the bedroom floor. I timed myself at 45 minutes the first time. It felt brutal. Then it felt free.
Keep only what you actually wear. If it has not left the hanger in a year, it goes. I bagged three full trash bags that first weekend. The floor space alone made the closet look twice as big.
Pro move: Work in one category at a time. Tops first. Then bottoms. Then shoes. Momentum builds when you finish a single group.
Double Up the Hanging Space With a Second Rod
This single change delivered the biggest win for me.
Most small walk-in closets come with one lonely rod. That wastes the entire lower half of the wall. I measured the height, marked a second rod 36 to 40 inches below the top one, and screwed in a simple tension rod or a cheap metal one from the store.
Tops go on the upper rod. Pants, skirts, and folded sweaters hang below. Instant double capacity. I gained room for about 30 more pieces without buying a single new shelf.
Use slim velvet hangers only. The old plastic ones steal inches. Matching hangers also make the whole wall look intentional instead of chaotic.
Build Floor-to-Ceiling Shelves on the Short Wall
Vertical space is free real estate. Most people ignore it.
I installed three floating shelves on the end wall that used to hold nothing but dust. Simple brackets and 1×12 boards painted to match the walls. Total cost under $40. Top shelf holds out-of-season bins. Middle shelf stores folded jeans and sweaters. Bottom shelf keeps daily accessories.
Leave 12 to 15 inches between shelves so you can actually see what sits there. Stack clear bins if you need more layers. Labels on the front of each bin save me every morning.
Turn the Back of the Door Into Prime Storage
Doors get ignored. Mine no longer does.
I hung a simple over-the-door organizer with deep pockets. One side holds scarves and belts. The other side holds everyday shoes and a few small bags. No drilling required. It took five minutes.
Some people use a full shoe bag with 20 pockets. I prefer the version with larger compartments so nothing gets crushed. Either way, the floor stays clear and the door works harder than it ever has.
Create a Vertical Shoe Wall With Simple Shelves
Shoes used to eat half my floor. Not anymore.
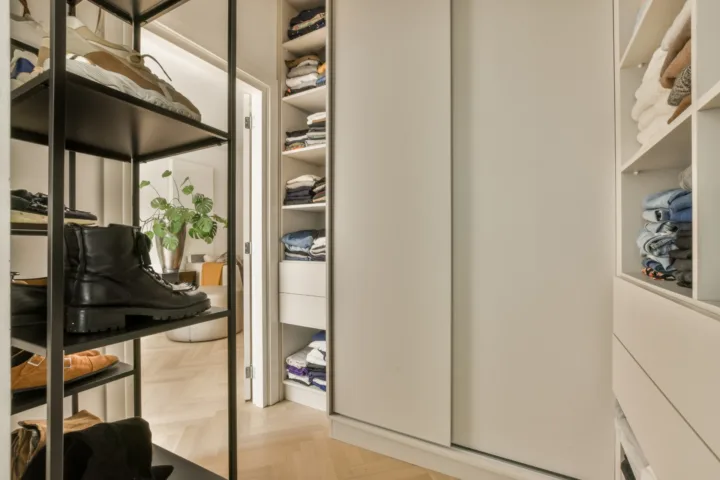
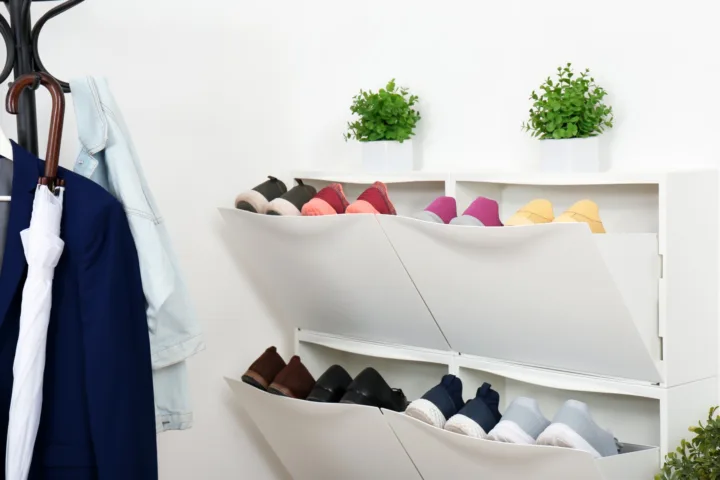
I built a narrow tower of shelves against one side wall using leftover wood and metal brackets. Each shelf holds two pairs side by side. Boots go on the bottom. Flats and sneakers stack higher. The whole unit is only 12 inches deep so it never blocks the walking path.
If woodworking feels like too much, a freestanding slim shoe rack works almost as well. I tried both. The wall-mounted version wins for pure space savings.
Add Dedicated Bag and Accessory Hooks
Handbags used to live in a sad pile on a shelf. Now they hang.
I screwed a row of sturdy hooks along the upper side wall, spaced about 8 inches apart. Each bag gets its own hook. Belts and hats share a second shorter row below. Everything stays visible and the shelves stay free for clothes.
Command hooks work if you rent. For permanent installs I prefer metal ones that can handle weight. Either choice beats the old heap system.
Carve Out a Drawer Zone for Small Stuff
Socks, underwear, and jewelry need their own home. Open shelves never work for them.
I slid a narrow set of plastic drawers under the lower hanging rod. Three drawers. One for socks. One for underwear. One for small accessories. Drawer dividers keep everything from mixing into chaos.
If you prefer wood, a cheap two-drawer cart from the office supply aisle fits the same spot. The key is keeping the height under the hanging clothes so nothing gets crushed.
Use Matching Baskets on Every High Shelf
Open shelves look messy fast. Baskets fix that.
I bought six identical fabric bins in a neutral color. They sit on the top shelves and hold seasonal clothes, extra bedding, and random items that have no other home. Because they match, the wall looks calm instead of busy.
Label the front of each bin with a simple tag. I used a label maker the first time. Now I just write on painter’s tape. Either method works. The goal is knowing what lives where without opening every container.
Install a Pull-Out Valet Rod for Outfit Planning
This one feels like a luxury but costs almost nothing.
I added a short pull-out rod that slides out from under the top shelf. Tomorrow’s outfit hangs there the night before. No more last-minute searches. No more clothes draped over chairs.
A simple tension rod mounted under a shelf works in a pinch. The dedicated pull-out version just feels smoother. Either way, the morning rush slows down.
Color-Code Everything Once the Structure Is Set
Visual order matters more than most people admit.
After the rods and shelves went in, I sorted every category by color. Light to dark. Same for pants. Same for jackets. The closet suddenly looks intentional. Finding a specific shirt takes seconds instead of minutes.
I keep the system loose. New pieces slide into the right color zone. The habit sticks because it is simple.
DIY a Pipe Clothing Rack for the Awkward Corner
Corners waste space in every small walk-in I have seen.
I built a simple L-shaped rack from black iron pipe and flanges. One side holds long dresses. The other side holds jackets. The whole thing cost under $50 and took one afternoon. It looks industrial and holds serious weight.
Measure twice. Cut once. Pipe fittings from the hardware store make this project almost foolproof.
Add Floating Shelves Above the Hanging Rods
The space above the top rod usually sits empty. Not in my closet.
I mounted two short floating shelves right above the upper hanging rod. They hold hats, small boxes, and a few folded items I use less often. Because they sit high, they never interfere with daily access.
Keep the depth shallow. Six to eight inches is plenty. Anything deeper starts to feel crowded.
Use Clear Containers for Seasonal Swaps
I rotate clothes twice a year. Clear bins make the switch painless.
Under-bed style bins with lids live on the highest shelves. Winter stuff goes in during summer. Summer stuff goes in during winter. Because the bins are clear, I can see the contents without opening every one.
Label the ends facing out. Stack no more than two high so nothing topples when you reach.
Mount a Full-Length Mirror on the End Wall
A mirror does more than help you check an outfit. It bounces light and makes the whole closet feel bigger.
I hung a simple full-length mirror on the wall opposite the door. Cheap frame. No fancy design. The space immediately felt less like a cave.
If the wall is too narrow, a mirror on the back of the door works almost as well. Either placement adds light and function without taking floor space.
Stick LED Strip Lights Under Every Shelf
Dark closets hide mess. Light reveals it and then fixes it.
I ran battery-powered LED strip lights under each shelf and along the top of the hanging rods. Warm white light. Motion sensor on the main strip so the closet lights up when I open the door.
The difference is night and day. I actually enjoy stepping inside now. Installation took twenty minutes and required zero wiring.
Create Zones That Match How You Get Dressed
Random storage fails. Zones succeed.
I divided the closet into four clear areas:
- Everyday tops and bottoms on the double rods closest to the door
- Dressier pieces farther back
- Shoes and bags on the vertical wall
- Accessories and small items in the drawer zone
Everything has a home based on how often I use it. The system stays clean because putting things away takes almost no thought.
Keep a Folding Step Stool Inside the Closet
High shelves only work if you can reach them.
I keep a slim folding step stool tucked against the side wall. It takes almost no space when folded. When I need the top shelf, it opens in two seconds. No more stretching or stacking boxes dangerously.
Some people use a small stool that doubles as seating. Either choice beats climbing on unstable bins.
Label Every Single Container and Shelf Edge
Labels feel optional until you live without them. Then they become essential.
I label the front edge of every shelf and the face of every bin. Simple black text on white tape. The labels force me to put things back in the right spot. They also help anyone else who uses the closet.
Consistency wins. Once the labels exist, the system almost maintains itself.
Finish With a Soft Rug and One Small Piece of Art
Function comes first. A little personality keeps the space from feeling like a storage unit.
I added a small washable rug in the center of the floor. It softens the hard surfaces and makes the closet feel finished. One small framed print hangs high on the side wall. Nothing fancy. Just enough to make the space feel like mine.
These final touches take ten minutes and change the entire mood.
Frequently Asked Questions
How much should I budget for these 19 diy small walk-in closet organization ideas? Most of the ideas cost under $20 each if you shop sales and use basic materials. My entire overhaul stayed under $200 because I already owned some bins and hangers.
Do I need power tools for any of these projects? A basic screwdriver and a level handle most of the installs. The pipe rack needs a pipe cutter or a hardware store cut, but nothing advanced.
What if my closet has no solid walls for mounting shelves? Tension rods, freestanding racks, and over-door organizers still deliver big results. I used those first in a rental and still gained serious space.
How often should I reorganize after the initial setup? I do a quick 15-minute reset every Sunday night. Full seasonal swaps happen twice a year. The system stays solid because the zones make sense.
Can these ideas work in a closet shared by two people? Yes. Just double the zones and keep each person’s items on opposite sides. Matching hangers and clear labels prevent mix-ups.
I still walk into my closet some mornings and smile. The space that used to stress me out now feels calm and useful. These 19 diy small walk-in closet organization ideas did not require a renovation or a huge budget. They just required starting and sticking with the basics.
Pick one idea this weekend. Install the second rod or clear the floor. Momentum builds fast once the first change sticks. Your future self will thank you every single morning.