I used to open my closet and feel a wave of defeat. Clothes piled on the floor. Shoes vanished into black holes. Accessories tangled in a heap. I tried every store-bought system and still ended up frustrated. Then I started testing real 18 closet organization ideas diy projects in my own space. Some cost under $10. A few took an afternoon. All of them stuck. These are the ones that actually changed how I get dressed every morning.
Honestly? I almost gave up after the third failed attempt at a fancy modular unit. The pieces never fit right. See, the real shift happened when I stopped chasing perfect and started building what worked for my weird little reach-in closet.
Why Most Closet Fixes Fail (And What I Did Differently)
I measured once. Then I measured again. Most people skip this part and buy stuff that sits half-empty. I cleared everything out first. Every single item. That step alone showed me how much I never wore.
I sorted into keep, donate, and maybe piles. The maybe pile got a two-week test. Anything I ignored went out. Suddenly the space felt possible. From there I built systems that matched my actual clothes, not some magazine photo.
Key takeaway: Start with less stuff. Everything else gets easier.
My Top 18 Closet Organization Ideas DIY
I tested these over months. Some I still use daily. Others I tweak with the seasons. Here they are, numbered so you can pick and choose.
1. Double Up the Hanging Rods
I installed a second rod about 40 inches below the original. Short shirts and pants hang on the lower one. Jackets and dresses stay up top. Vertical space stopped going to waste. I used simple brackets and a tension rod for the first version. Later I switched to a solid wood rod for heavier coats.
This one change nearly doubled my hanging capacity. No tools beyond a drill. FYI, measure the height of your longest items before you lock the positions.
2. DIY Plywood Shelves for Folded Clothes
I cut ¾-inch plywood to the exact width of my closet. Sanded the edges. Mounted them on adjustable brackets. Now sweaters and jeans sit in neat stacks at eye level. Out-of-season stuff goes higher.
I painted mine white to blend with the walls. The result looks custom without the custom price. IMO this beats any wire shelf system for stability.
3. Clear Bins with Simple Labels
Opaque boxes hide everything. I switched to clear plastic bins and stuck on handwritten labels. Workout gear. Winter scarves. Travel accessories. I can see contents without opening anything.
I keep the bins on the top shelf. Grab-and-go takes seconds now. The labels peel off when seasons change, so nothing feels permanent.
4. Over-the-Door Shoe Organizer for More Than Shoes
I hung a 24-pocket mesh organizer on the inside of the door. Shoes go in the bottom rows. Hats, belts, and light scarves fill the top. The door stays usable. Floor space stays clear.
This was my cheapest win. Under $15 and zero installation stress.
5. PVC Pipe Second Rod
Half-inch PVC pipe costs almost nothing. I cut it to width, painted it to match the walls, and mounted it on basic brackets. Instant extra hanging space for kids’ clothes or short tops.
It holds more weight than I expected. When I moved apartments I just unscrewed the brackets and took it with me.
6. Copper Pipe Industrial Rods and Shelves
I wanted a tougher look. Copper pipe and flanges gave me both rods and open shelves. The metal feels solid. The warm tone makes the closet look intentional instead of temporary.
I measured twice, cut once, and secured everything into studs. It has held up for two years of daily use.
7. Wooden Shelf Dividers
Stacked sweaters used to topple. I cut thin plywood strips and slid them between piles. Everything stays upright. Categories stay separate.
I made a dozen in one evening. They cost less than a coffee run and keep the shelf looking sharp.
8. Wicker Baskets for Soft Accessories
I lined the bottom of the closet with three large wicker baskets. One for scarves. One for gloves and beanies. One for random belts. They slide out easily and hide the clutter.
Natural texture softens the whole space. I prefer them over plastic for anything that touches skin.
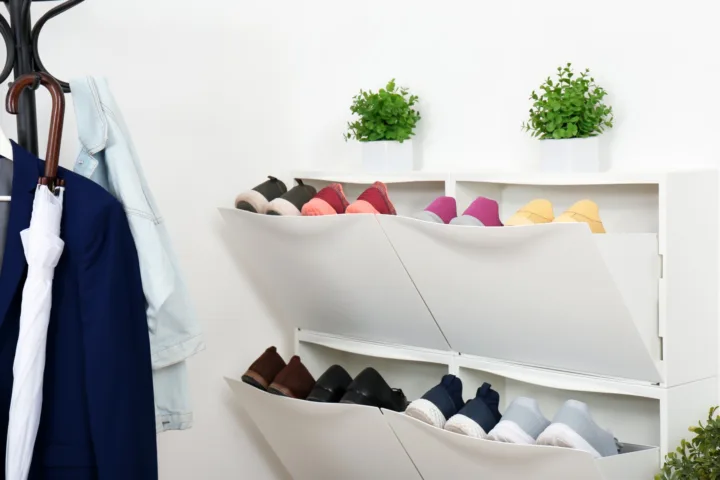
9. Simple DIY Shoe Cubbies
I stacked leftover wood crates on their sides. Each crate holds two pairs. I painted the fronts to match. Now every shoe has a home and none sit in a pile.
This works best for flats and sneakers. Boots still need floor space or a taller rack.
10. Wall Hooks for Bags and Hats
I screwed a row of sturdy hooks into the side wall. Everyday bags hang there. Hats sit above them. Nothing gets crushed or forgotten in a corner.
I chose matte black hooks so they disappear against the paint. Morning grab time dropped dramatically.
11. Hanging Fabric Organizer for Folded Items
A six-compartment hanging organizer hangs from the main rod. Socks, underwear, and light tees live there. It uses the vertical space under longer garments.
I rotate the contents seasonally. The fabric is easy to wipe clean when dust builds up.
12. Tension Rod for Boots
I placed a tension rod low in one corner. Boots hang upside down from the shafts. They stay upright, air out, and free the floor.
This trick works only if the rod is strong enough. I tested a few until I found one that stayed put.
13. Repurposed File Organizers for Flats
Vertical file folders attached to the door hold slim flats and flip-flops. Each pair slides into its own slot. Perfect for the pairs I reach for most.
I painted the organizers to match the closet interior so they blend in.
14. Pegboard for Jewelry and Small Accessories
A small wooden pegboard mounted on the side wall holds necklaces, earrings, and bracelets. Hooks and small shelves keep everything visible and tangle-free.
I love how customizable it stays. Move a peg and the whole layout changes.
15. Drawer Dividers from Foam Board
I cut foam board into strips and created grid dividers for a small dresser I slid into the closet. Socks, ties, and underwear stay in neat rows.
This costs pennies and takes under an hour. The dividers slide out for cleaning.
16. Floor-to-Ceiling Open Shelving
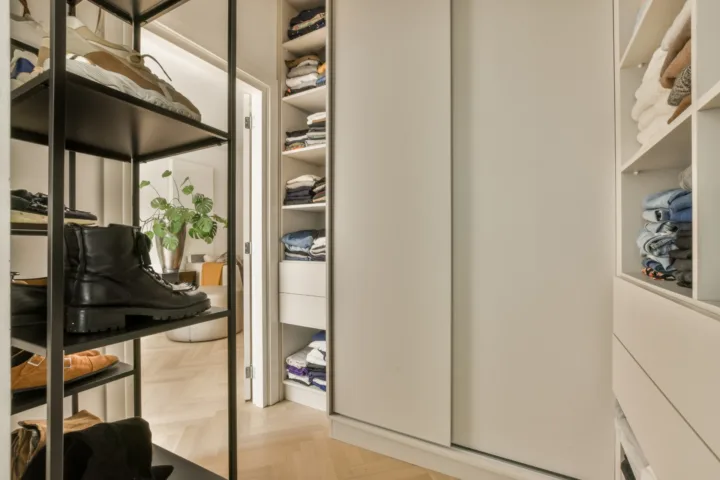
I ran shelves from floor to ceiling on one side. Bottom shelves hold shoes. Middle shelves hold folded jeans and sweaters. Top shelves hold luggage and seasonal bins.
Everything stays visible. Nothing gets buried. I used inexpensive pine boards and painted them the same color as the walls for a built-in look.
17. Sliding Wire Baskets for Everyday Essentials
I mounted simple wire baskets on sliding tracks under a shelf. One holds socks. Another holds workout clothes. They pull out like drawers without the cost of real drawers.
These keep the floor clear and the most-used items within arm’s reach.
18. Matching Slim Hangers Across the Board
I replaced every mismatched hanger with slim velvet ones. Clothes slide less. More fit on each rod. The uniform look makes the whole closet feel calmer.
This is the smallest change with the biggest visual impact. I did it last and suddenly everything else looked intentional.
How I Keep the System Working Long-Term
I do a five-minute tidy every Sunday night. Anything out of place goes back. Seasonal swaps happen twice a year. I pull winter stuff down and summer stuff up. The bins make that painless.
I also refuse to buy new clothes without removing something first. The space stays under control because the rules stay simple.
See, the goal was never a perfect Instagram closet. It was a space that lets me find what I need without stress. These 18 closet organization ideas diy delivered exactly that.
Real Results from My Own Closet
Before these changes I spent ten minutes every morning hunting for shoes. Now I grab what I need in under two. Laundry day feels lighter because everything has a clear home. Guests sometimes open the door and ask how I keep it so calm. I just smile and tell them the truth: I built most of it myself on a tight budget.
The copper pipe rods still look good. The clear bins still show me exactly what lives inside. The double rods still hold more than I thought possible. Nothing fancy. Just practical moves that stuck.
Frequently Asked Questions
What are the easiest 18 closet organization ideas diy for beginners? Start with the double hanging rods, clear labeled bins, and over-the-door organizer. Those three need almost no tools and deliver the fastest wins.
How much should I budget for these DIY projects? Most of mine cost under $20 each. The copper pipe version ran higher but still stayed well below a store-bought system. Focus on one or two at a time.
Do these ideas work in tiny closets? Yes. The vertical moves (second rod, floor-to-ceiling shelves, over-door storage) make the biggest difference in small spaces. Measure carefully and prioritize height.
How often do I need to reset the system? I do a quick tidy weekly and a deeper seasonal switch twice a year. That keeps clutter from creeping back.
Can I mix store-bought pieces with these DIY ideas? Absolutely. I kept a few wire baskets I already owned and paired them with the plywood shelves. The combination works better than either alone.
I still walk past my closet and feel a quiet sense of relief. No more avalanche of clothes. No more mystery shoes. Just a system I built with my own hands that actually fits the way I live. Pick two or three of these ideas this weekend. Build them. Live with them for a week. Then add the next ones. Your mornings will thank you.