
I spent years fighting a narrow closet pantry that swallowed half my groceries and left me digging for pasta sauce at 6 p.m. Those 17 closet pantry organization ideas I tried and refined over time turned the space from a black hole into something I actually enjoy opening. I still remember the day I pulled everything out and realized I owned four half-empty bags of rice. That moment changed how I approached the whole project.
See, the problem was never the size of the closet. It was the lack of a system that matched how I cook and shop. I tested every common trick I could find. Some worked. Some wasted money. The ones that stuck are the ones I share here. You get the real versions, complete with the mistakes I made along the way.
Start with a Ruthless Purge Before You Buy a Single Bin
I used to skip this step. Big mistake. I would buy pretty containers and still end up with expired cans buried in the back. Now I empty the entire closet onto the kitchen table or floor. Everything comes out.
I check dates. I toss anything past its prime. I donate unopened items I know I will never use. This one action alone frees up more space than any organizer. Honestly? It feels like a reset button for the whole kitchen.
Once the shelves sit empty, I wipe them down. Then I measure every shelf depth and height. Those numbers decide what actually fits. Guessing leads to returns. Measuring keeps the process cheap and effective.
Create Clear Zones That Match How You Actually Live
I stopped sorting by container type years ago. That approach looked tidy for about a week. Then real life hit. Now I divide the closet into zones based on daily habits.
- Breakfast zone: Cereals, oats, coffee, tea, and granola bars sit at eye level.
- Snack zone: Chips, crackers, and kids’ favorites go in easy-reach bins.
- Cooking staples: Oils, vinegars, and canned tomatoes live together.
- Baking zone: Flour, sugar, and extracts stay in one dedicated section.
- Backup bulk: Extra paper towels and large bags go on the top shelf.
This system works because I reach for the same groups of items most days. You open the door and know exactly where to look. No more hunting.
Decant Dry Goods into Matching Clear Containers
I used to leave everything in its original packaging. Bags tipped over. Boxes crushed. Half the time I could not tell what I had left. Switching to clear, stackable containers fixed that.
I choose square or rectangular shapes because they waste less space than round ones. I fill them with rice, pasta, oats, and snacks. Labels go on the front and the lid. When the container runs low, I see it immediately and add the item to the shopping list.
The first time I finished this step, the closet looked like a store display. That visual calm made me more likely to put things back in the right spot. Consistency sticks when the system looks good.
Install Shelf Risers to Double Visible Space
Deep shelves hide the back row. I learned this the hard way after buying three bottles of the same hot sauce. Shelf risers solve it. They create a second level so the rear items stay visible.
I use simple metal or plastic risers that fit the depth of my shelves. Canned goods go on the lower level. Smaller jars sit on the raised platform. Everything stays in sight. No more forgotten bottles turning into science experiments.
Add Lazy Susans for Corner and Deep Spots
Corners and deep shelves used to be dead zones. I stuck a couple of lazy Susans in those spots and the difference was immediate. I spin the tray and grab what I need without moving ten other items first.
I keep one for oils and vinegars. Another holds spices or small jars. The spinning action keeps everything accessible. FYI, the cheaper plastic ones work fine if you wipe them down now and then.
Hang an Over-the-Door Organizer for Instant Extra Storage
The back of the door is pure free real estate. I hung a multi-pocket organizer there and gained space for spices, packets, and small bottles that used to clutter the shelves.
Some versions have clear pockets so you see everything at a glance. Others use wire baskets. I prefer the ones that hang over the top of the door without drilling. They stay put and leave the shelves free for larger items.
Switch to Pull-Out Shelves or Slide-Out Trays
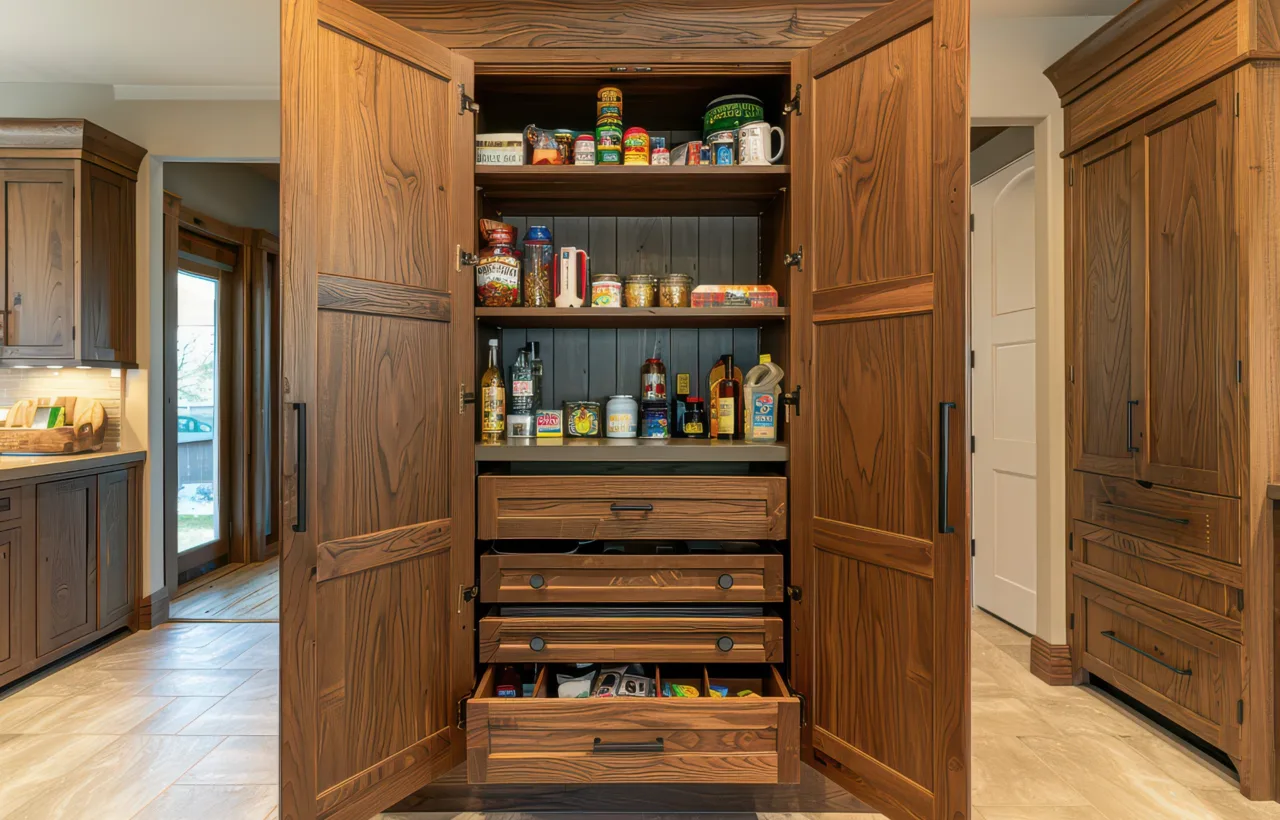
Fixed shelves force you to reach into the dark back. I installed a couple of simple pull-out trays on the lower levels and the frustration dropped overnight. Everything slides forward. I can load the tray full and still reach the last item.
If a full remodel is not in the budget, freestanding slide-out units that sit on existing shelves work almost as well. I use them for heavier canned goods and bottles. The investment pays off every time I cook.
Use Woven or Fabric Bins to Hide Visual Clutter
Clear containers show every detail. Sometimes that creates visual noise. I mix in woven bins or fabric baskets for items that do not need constant viewing. Paper towels, extra napkins, and bulk bags disappear inside them.
I label the front of each bin. The texture softens the overall look of the closet. It also makes the space feel warmer instead of clinical. I keep two or three matching ones so the system stays cohesive.
Go Floor to Ceiling with Shelving
Most closet pantries waste the top third of the space. I added shelves all the way up and stored the items I use least often on the highest levels. A small step stool lives nearby for those rare grabs.
Everyday items stay between waist and eye level. The top shelves hold seasonal baking supplies, party extras, and backup stock. Vertical space is the cheapest expansion you can make.
Group Identical Items Like a Grocery Store
I line up cans of the same type in neat rows. Pasta boxes stand together. Snack bags sit in one section. This grocery-store approach makes inventory checks fast. I know at a glance when I am running low.
It also looks cleaner than random stacking. When I unload groceries, I put new items behind the older ones. First-in, first-out becomes automatic.
Cover Wire Shelves for Stability
Builder-grade wire shelves let small packages tip and fall through the gaps. I covered mine with thin plywood or plastic shelf liners. The smooth surface keeps boxes upright and prevents tiny items from disappearing.
The fix costs almost nothing and changes how usable the shelves feel. Everything sits flat. Nothing teeters.
Add a Rolling Cart for Flexible Overflow
Floor space in a closet pantry is limited, but a slim rolling cart fits in many of them. I load mine with baking supplies or appliances I use weekly. When I need something, I roll the cart out. When I finish, it rolls back in.
The mobility means I can use the cart in the kitchen during big cooking sessions and return it afterward. It acts like an extra mobile shelf.
Label Everything in Sight
Labels turn a pretty setup into a functional one. I use a simple label maker for containers, bins, and shelves. Handwritten labels work too if the handwriting is clear.
I include the name and sometimes the date I filled the container. Everyone in the house knows where items belong. Guests can find the snacks without asking. Labels remove the mental load of remembering the system.
Create a Kids’ Snack Station at Their Height
If you have little ones, put their snacks on a low shelf or in a labeled bin they can reach. I did this and stopped hearing “Mom, where are the crackers?” twenty times a day.
The rest of the pantry stays off-limits to them. They learn independence. You keep the higher shelves for adult items and sharp tools.
Install Simple Door-Mounted Spice Racks
Spices take up valuable shelf real estate. I moved most of mine to a narrow rack on the inside of the door. The bottles stay visible and easy to grab while cooking.
Magnetic strips or small wire racks both work. The door becomes a vertical spice library. Shelves open up for larger containers.
Keep a Mini Inventory List on the Door
I tape a small laminated list to the inside of the door. It lists the items I tend to run out of first. When I notice something is low, I mark it. Shopping trips become faster because the list already exists.
The list also prevents double buying. I check it before I leave for the store. Simple paper solution. Huge time saver.
Maintain the System with a Monthly Five-Minute Check
Organization fails when you never revisit it. Once a month I open the closet, scan for expired items, and straighten any bins that shifted. Five minutes keeps the whole system working.
I treat it like brushing my teeth. Small regular effort beats a massive overhaul every six months. The closet stays usable instead of sliding back into chaos.
Frequently Asked Questions
How do I organize a very deep closet pantry without everything getting lost in the back? I rely on pull-out trays, shelf risers, and lazy Susans. Those three tools bring the back items forward so nothing disappears.
What is the cheapest way to start with these 17 closet pantry organization ideas? Begin with a purge and some dollar-store bins or baskets. Measure first, then add only the pieces you truly need. Labels and clear containers come next.
Should I use all clear containers or mix in baskets? I mix them. Clear ones for items I check often. Baskets for bulk or less pretty items. The combination keeps the look balanced and functional.
How often should I reorganize the pantry? A full reset every six months works for me. A quick five-minute tidy once a month keeps the system from falling apart in between.
Can these ideas work in a tiny reach-in closet? Yes. Focus on vertical space, door storage, and zones. Even a narrow closet becomes useful when every inch has a job.
I still open my closet pantry every day and feel a small hit of satisfaction. The system holds up because it matches real life instead of magazine perfection. Start with the purge. Add the pieces that solve your specific pain points. Keep the zones simple. The rest follows.
You do not need every idea on this list. Pick the five that solve the biggest frustrations in your space and build from there. The goal is a closet you can use without thinking. That is the real win.