I spent years staring at a closet that looked like a laundry explosion every single morning. Clothes piled on the floor. Shoes vanished into black holes. I wasted precious minutes hunting for one matching sock while running late. That frustration pushed me to hunt for real 16 closet organization ideas on a budget that actually stuck. No custom systems. No big spending. Just practical moves that fit my small space and tighter wallet.
Honestly? I felt defeated more than once. I tried fancy organizers that gathered dust. I bought bins I never used. Then I shifted. I focused on simple fixes that cost almost nothing or under twenty bucks each. The result surprised me. My mornings got calmer. I could see everything. And I kept the system going without constant battles.
See, the real win came from treating the closet like a daily tool instead of a storage dump. I share these ideas because they worked in my own cramped reach-in closet. You can steal them and tweak them. Let’s walk through what I did.
Starting With the Foundation That Costs Zero
Before any product hits the cart, I empty the whole closet. Everything comes out. I sort into keep, donate, and trash piles right on the bed. Items I have not worn in a year go straight to the donate bag. That step alone frees serious space.
I once kept a stack of “maybe someday” shirts that never left the hanger. Clearing them felt like breathing room. You gain floor and rod space without spending a dime. Then I wipe the shelves and vacuum the floor. A clean base makes every later idea stick better.
This purge sets the tone. I do it seasonally now. Spring and fall. It keeps the system from sliding back into chaos.
My 16 Closet Organization Ideas on a Budget
Here come the practical moves I rely on. Each one stayed under my personal twenty-dollar limit or used things I already owned. I tested them in real life with limited closet real estate.
1. Switch to Slim Velvet Hangers
Plastic hangers eat rod space. I swapped every single one for slim velvet versions. A fifty-pack runs about fifteen dollars. They grip clothes so nothing slides off. The thinner profile lets me hang nearly twice as many shirts.
I noticed the difference the first morning. I could actually slide hangers without a fight. FYI, the velvet also stops those annoying shoulder bumps on delicate tops.
2. Add a Second Hanging Rod
Most closets waste the lower half. I hung a simple cascading rod that drops from the main one. Cost sat around twelve dollars. Shirts stay up top. Pants and skirts hang below.
This one change doubled my hanging capacity in one afternoon. I no longer stack pants on the shelf where they topple over.
3. Install Over-the-Door Organizers
The back of the door sat empty for years. I hung a clear pocket organizer for shoes and another for accessories. Fifteen dollars each. Socks, belts, and scarves live there now. Zero floor or shelf space used.
I grab what I need without digging. The clear pockets show everything at a glance.
4. Use Shelf Dividers
Folded stacks used to lean and collapse. I slipped in cheap acrylic or wire dividers. A set of six cost under ten dollars. Now sweaters stay upright like books on a shelf.
I can pull one without the whole pile falling. That small win saves frustration every time I reach in.
5. Bring in Fabric Bins
Open shelves looked messy with loose piles. I added a few fabric bins from the dollar section or basic packs. They hold workout clothes, pajamas, and off-season items. Label the front with simple tape if you want.
I stack two high on the top shelf. Everything stays contained and dust-free.
6. Try Tension Rods for Extra Zones
Tension rods cost almost nothing. I placed one horizontally under the main rod for scarves. Another pair sits low to hold flats like a makeshift shelf. No tools needed. Just twist and lock.
This trick turned dead space into usable storage. I keep the lighter items here so the rods hold firm.
7. Stick Up Command Hooks
Command hooks leave no marks. Perfect for renters like me. I put several inside the door and on the side walls. Bags, hats, and necklaces hang there. A multipack runs under eight dollars.
I stopped tossing purses on the floor. They stay visible and ready.
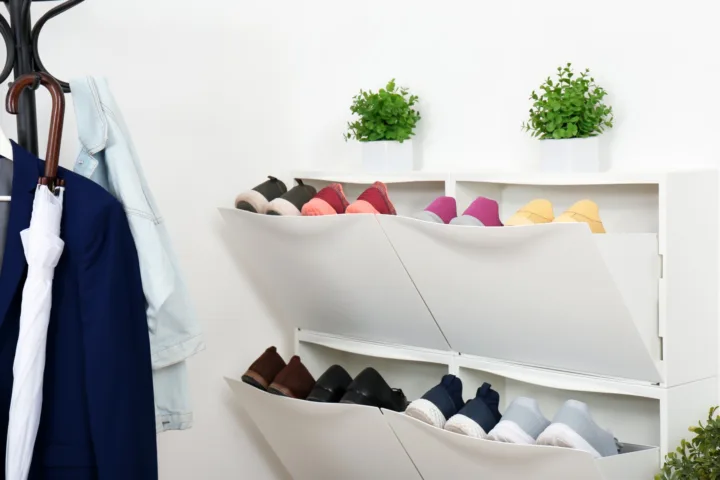
8. Add Simple Shoe Stackers or Slots
Shoes used to claim the entire floor. I bought plastic slots that double the pairs on one shelf. Around twenty dollars for a solid set. Boots stand on the floor against the wall with boot shapers made from rolled magazines if needed.
Pairs stay together. I no longer hunt for the left shoe under a pile.
9. File-Fold Everything Possible
I stopped stacking shirts flat. Now I fold them vertically so the edge faces out. Same method for jeans and tees. This uses drawer or bin space better and lets me see every item.
I learned this after one too many toppled stacks. It takes the same time as regular folding but works harder.
10. Group by Category First
I used to hang by color only. That looked pretty but slowed me down. Now I group shirts together, then pants, then dresses. Within each group I do light color sorting. Finding a work top takes seconds.
This system matches how I actually get dressed. Category first. Style second.
11. Repurpose Shoeboxes and Cardboard
I wrap old shoeboxes in leftover wrapping paper or plain kraft paper. They become free drawers for belts, socks, or small accessories. Cut cardboard strips make instant shelf dividers too.
I love that these cost nothing yet look intentional once lined up.
12. Hang a Multi-Shelf Organizer
A fabric hanging shelf unit with five or six cubbies hooks right on the rod. About fifteen dollars. I drop folded sweaters or bags of seasonal scarves inside. It uses vertical space that usually sits empty.
I pull one cubby at a time without disturbing the rest.
13. Create Under-Shelf Baskets
Wire under-shelf baskets slide onto existing shelves. They hang below and hold extra pairs of shoes or small bins. A two-pack stays under twenty dollars. Instant extra layer without drilling.
I keep everyday sneakers there so the floor stays clear for bigger boots.
14. Rotate Seasons Aggressively
I pull off-season clothes into under-bed bins or high top-shelf bags. Vacuum bags work if space is tight. This clears the active rod and shelves for current weather pieces only.
I do the swap twice a year. My closet feels twice as large during peak seasons.
15. Use Multi-Pant or Cascading Hangers
One hanger can hold four or five pairs of pants with the right design. Swing-arm styles cost under ten dollars. I free up long stretches of rod this way.
Pants stay wrinkle-free and easy to grab. No more single-hanger waste.
16. Label Everything Simply
I use masking tape and a marker for bins and shelves. Or printable labels if I feel fancy. Labels stop the “where did I put that” moments. Even my partner can find things without asking.
This tiny habit keeps the whole system alive longer than any product alone.
What Actually Worked Best for Me
I started with the purge and slim hangers. Those two alone transformed the daily experience. Then I layered the double rod and door organizers. The rest filled in over a couple of weekends. Total spend stayed under one hundred dollars for everything new.
IMO the biggest mindset shift was accepting imperfect. My closet still has days when a shirt lands on the floor. But the structure makes cleanup fast. I no longer feel like I need a full remodel.
I compared a few store-bought systems against these DIY routes. The kits looked sleek but cost three times more and required tools I did not want to buy. My mixed approach gave similar function with way less stress.
Common Pitfalls I Hit Along the Way
I once bought too many bins before measuring. They sat unused in the hallway. Measure first. Then shop.
Another time I skipped the purge and just added organizers. The mess simply looked more expensive. Empty first. Always.
I also learned that matching everything is optional. Uniform hangers help. Uniform bins look nice. But function beats perfect matching every time.
Frequently Asked Questions
How much should I expect to spend on these 16 closet organization ideas on a budget?
Most people finish a solid overhaul for under one hundred dollars if they shop sales and reuse boxes. I kept mine closer to seventy by starting with free steps and dollar-store finds.
Do these ideas work in a tiny apartment closet?
Yes. I use them in a standard reach-in that is under four feet wide. Vertical space and door real estate become your best friends in small footprints.
What if I rent and cannot drill holes?
Stick to tension rods, over-the-door pieces, Command hooks, and freestanding bins. Zero permanent changes required.
How often do I need to maintain the system?
I do a quick five-minute tidy every Sunday and a full seasonal reset twice a year. That keeps everything functional without constant work.
Can I mix these with a few nicer pieces later?
Absolutely. Start budget and upgrade one item at a time if you want. The foundation stays solid either way.
Wrapping It Up With Real Results
I went from daily closet dread to a space that supports my mornings. These sixteen moves gave me visibility, breathing room, and actual calm. No big renovation. No regret purchases.
Pick three ideas this weekend. Start with the purge and slim hangers. Feel the difference. Then add the rest as energy allows. Your future self will thank you when the next rushed morning arrives and everything sits right where it belongs.
I still smile a little every time I open the door and nothing falls out. That quiet win keeps me consistent. Give it a try. You might surprise yourself too.